We followed the process of settling our shipped or purchased eggs. We collected the eggs from your girls. Now you are ready to set the eggs. Of course, you set up the incubator at least a day ahead and you know the temperature near the top of the eggs is going to be 99.5 degrees F with a +/- .5 variance.
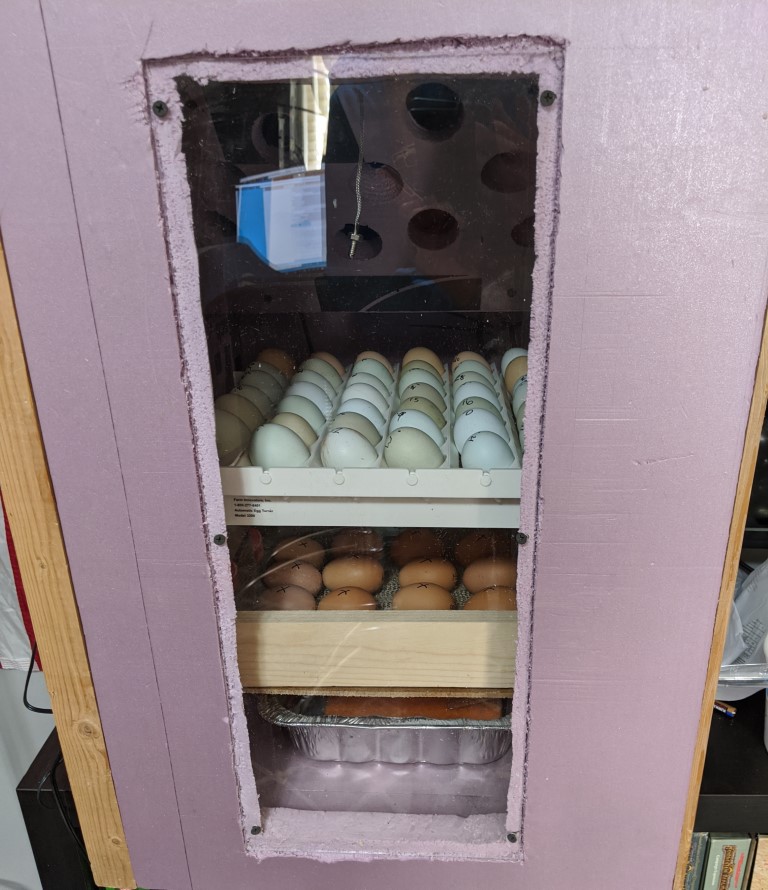
The number of eggs collected/acquired is totally up to you and the capacity of your incubator. Our homemade incubator can hold 82 eggs, but we decided to set 53 eggs this time. (It strikes me that I should name the incubator something when it is that ugly it needs a name. Help me out below with a suggestion.)
I promised in the video that the blog would be geekier than the video. So here we go. I track the eggs incubated, I have a Google Sheet that I fill out for each hatch/egg. Here is a list of the steps I take before putting them into the “box”
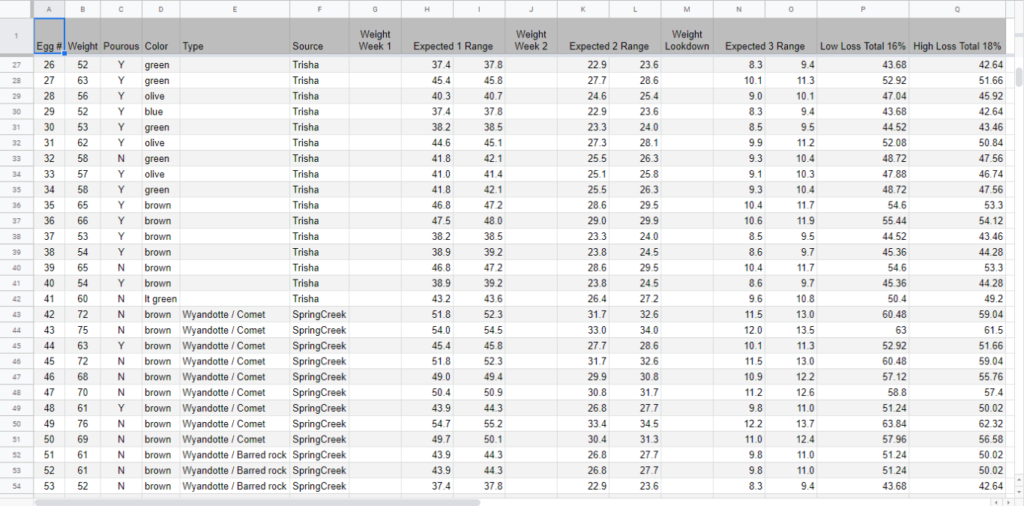
- Number the egg, on the top and bottom of each egg I put a number, 1 through the number of the egg. Of course, you could number them as you like. I just keep it simple as writing on eggs is hard enough for my giant hands. When writing on the eggs, use a pencil or a sharpie. I write it on both ends of the egg as the chicks have a way of destroying useful things like numbers written on the eggs when they break free of it. Putting the number in more than one place increases the odds that I’ll be able to see it later.
- Weigh the egg in grams. Each egg is weighed to allow me to track its progression without candling. No worries I will be using the candler. A chicken egg should lose 16 to 18 percent of its overall weight during the incubation process. By getting the weight beforehand I can tell that the humidity in the incubator is correct. The Google Sheet tracks the progress by week. If the eggs are a little heavy, I need to cut back on the humidity, if they are light, I need to increase it.
- I candle each egg. We are doing two things here, first, we are making sure there are no cracks, second we are rating the egg as to whether it is overly porous. All eggs are porous, the bloom seals the pores and protects the egg from bacteria. If an egg is overly porous, the lining inside the egg will dry and potentially kill the embryo. It may seem callous, but I’m tracking this egg-type so I can see what happens. Let’s call it science!
- I enter the color of the egg, the breed if I know it and who the source is. Now that my spreadsheet is satisfied I can put the eggs in the incubator.
I lied, it is too soon for the incubator. I have one more question for you. How are we going to turn the eggs? If you have an automatic turner, I use this one: Farm Innovators Model 3200 Automatic Egg Turner. Then skip this paragraph. For our hand turners, we need a way to track which side is up. So the first step is to mark one side of the egg with an X and the other side with an 0, as seen below. When you hand turn, just like in storage, we want to turn the egg an odd number of times (at least 3) a day. If the egg starts the day with an X on top it should end the day with an 0 and visa versa.
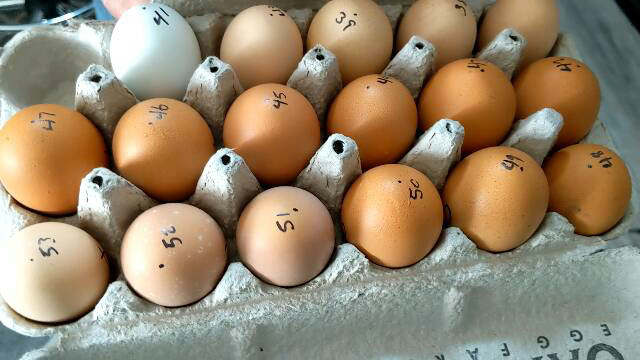
Eggs are numbered 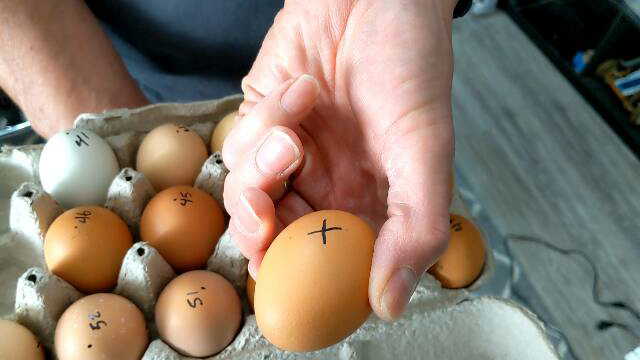
X on one side 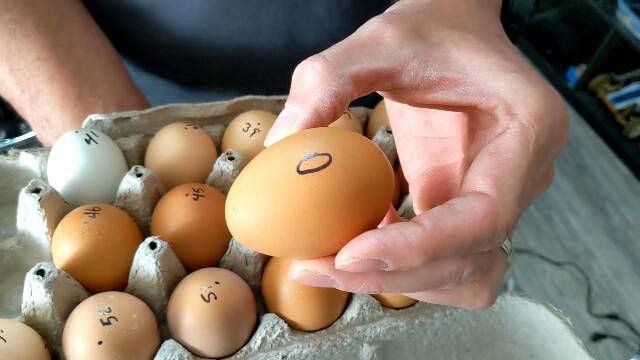
O on the other
Okay, now we get to put the eggs in the incubator. If your automatic turner is a vertical one like mine, then we are going to insert the egg so the air sack is up. If you are hand turning or have a horizontal turner then you lay the eggs on their sides.
Close up the incubator and prepare for the longest 21 days of your life.
The item links in this blog are affiliate links. Here are the two items I use for your convenience:
Egg Candler: Magicfly Bright Cool LED Light Egg Candler Tester, Power by Power Supply Only
Egg Turner: Farm Innovators Model 3200 Automatic Egg Turner
The video version of this blog is here: YouTube
0 Comments