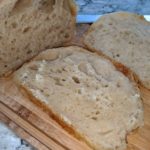
Sourdough Bread (No Knead Loaf)
Time to turn your Sourdough starter into a two loaves of bread
Servings: 30 Slices
Equipment
- 2 - 4"x8" loaf pans
- Large Bowl
- Cooling rack
- Oven
- Dough Knife
Ingredients
Step 1
- 600 grams Warm Water (98 degrees) (warm but not hot to the touch if you don't have a thermometer) 2 1/2 cups
- 80 grams Whole wheat flour 3/4 cup
- 720 grams White bread flour 5 3/4 cups
Step 2
- 21 grams Kosher Salt 1 tbsp, slightly heaping
- 4 grams Instant dried yeast 1 tsp
- 360 grams Sourdough Starter (see blog post) 1 1/3 cups
Step 3
- 2 tbsp Butter
- All-purpose flour
Instructions
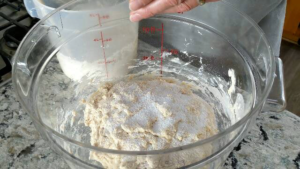
Step 1, Hydrate the flour
- In a large bowl (easiest if you find one with a lid or that you can cover with plastic wrap), add 600 grams of 98-degree water and both flours.
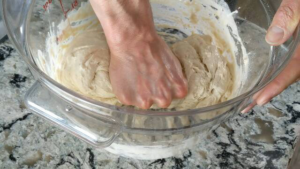
- We are going to mix this by hand, yes by hand. The only way you will know that you have gotten this bread mixed thoroughly and without lumps is to get in there. Flour + Water = sticky and we want to leave as much of that mixture in the bowl. To do this you need to wet your mixing hand. Run the warm water over your hand then get to mixing. Flip it over, pinch it, press it.

- Once it is smooth and your hand is completely covered in flour and water you are done. Wet the other hand and use it to remove the excess from the mixing hand.
- Cover and let the mixture stand for 30 minutes. This gives the flour a chance to hydrate completely.
Step 2, Add everything else
- After the 30 minute rest, the flour should still be a little warm. We are using this warmth to help get the yeast going in the next step. If it isn't warm, next time adjust the water temperature up a little more.
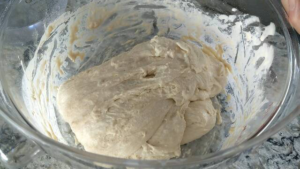
- Add the salt, yeast and sourdough starter to the hydrated flour.
- Time to get that mixing hand sticky again. Make sure and wet it, we don't want to add to much water to the mix, but a wet hand is the best way. Once you have it basically incorporated, fold the dough into a log and pinch it across its width in multiple locations. Then fold it on itself again and pinch it down the length again. You will feel if there is anything that isn't incorporated. Continue until it is smooth. Clean your hand again like in step one. Cover and let sit for 30 minutes.
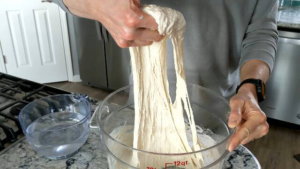
Step 3, building the gluten
- We are not going to knead the breed, we are going to stretch it. This works just as well with much less effort.
- Remove the lid from your dough.
- Get your hand moist this time and reach in under one side of the dough. If will be very loose. Grab it and pull it up, giving it a good stretch without pulling it apart. Fold this to the other side of the dough. Rotate the bowl clockwise one-quarter turn and repeat the process until you have done "all four sides".
- Your dough should have transformed from a loose blob to a tighter ball in the center of the bowl. Don't worry it will relax again.
- We are going to do this step two more times at 30-minute intervals. Each time the dough should be tighter when we finish.
Rest
- Now we are going to let the dough rest for at least an hour and a half or until it doubles.
Form Loaves
- Butter the loaf pans on the bottom and the sides.
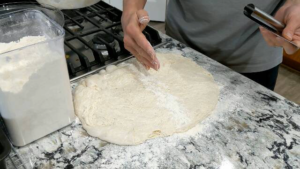
- On a clean and dry surface, lightly coat the surface with all-purpose flour.
- Pour your risen dough onto the floured surface. I hold the bowl upside down and wait for it to get around to falling. Be gentle, you don't want to punch it down or anything.
- Visually split the dough in half and mark the divide with a straight line of flour. This line will help prevent your cutting tool from sticking when you divide the loaf.
- Using a dough knife, split the dough on the flour line. You can roll the first half a little but don't coat it with flour too much.
- Now for the tricky part. Next to the remaining dough, you want a space that isn't floured. Take half the dough and place it arm's length away from you, Tuck your fingertips under the far side of the dough and gently pull it towards you. The leading edge, close to you will pull under the ball a bit and the dough will start to form a skin (or tighten). Rotate the dough clockwise a quarter turn, extend and pull again (keep the seam that forms under the dough on the bottom of the dough ball). After a few pulls, the top of the dough will have a nice sheen to it. NOTE: If the dough is too wet and sticks, pat some flour onto the sticky parts. NOTE 2: There is a feel for this. Take your time and watch the video. I know I make it look easy, but I've done it a lot. You will get there.
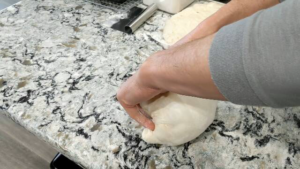
- Once the dough has a nice tight skin, put it in your buttered loaf pan and repeat with the other half.
Second Rise, option 1
- Spray the inside of a gallon and a half Ziploc bag with cooking oil, this is to prevent the loaf from sticking to the bag. You only need to spray the "top" of the bag where the dough may touch.
- Put a loaf pan into the bag so the exposed dough faces the sprayed side of the bag.
- Repeat for the other loaf.
- Put both loaves into the refrigerator overnight. This will greatly slow the second rise but will add a nutty flavor to the sourdough. Plus you can delay the baking of the bread to first thing in the morning which is a great smell to start the day.
- Take the loaves out of the refrigerator when you start warming your oven.
Second Rise, option 2
- Spray non-stick cooking oil on plastic wrap and cover your loaves.
- Let the loaves sit in a warm place for about two hours until they double (this option is not quoted in the time to make the loaf as I rarely use it unless I'm out of bread and want a loaf ASAP).
- When the loaves are about an hour from finishing the rise, start your oven.
Preheat the Oven
- Put the rack so the bread will be in the center of the oven.
- Ovens need time to get the temperature right and stabilize. Start the oven one hour before you are going to cook the bread. Set the oven to 450°.
Cook the bread
- To be quick about the oven opening and closing, place both loaf pans on a jelly roll pan with a nice gap between them.
- Put the loaves into the oven.
- Set the timer for 19 minutes.
- Once the timer goes off, don't open the oven. Reduce the temperature to 350° and reset the timer for another 19 minutes.
- Once the 38 minutes are up, the center of the bread should be 195°. Take the loaves out and remove the pan, putting them onto the cooling rack.
- After 20 min, eat it. :)